pinhole photography.
What is a pinhole camera?
A pinhole camera is a simple camera without a lens and with a single small hole – When light passes through this hole and the image inverters to the opposite side of the box. One example of a similar pinhole that is part of us is the human eye. The human eye does exactly what a pinhole camera does, yes that does mean that the image inverts however our brain flips that image back around.
What are the most unusual objects that have been used to make pinhole cameras over the years?
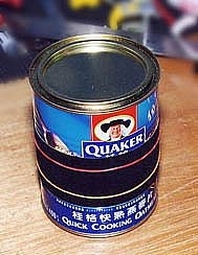
cameras have been made of sea shells, many have been made of oatmeal boxes, coke cans or cookie containers, at least one has been made of a discarded refrigerator.
How does a pinhole camera work?
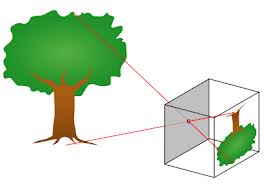
Firstly, the suns ray shines on to a object, then the rays reflect off the object.
After the rays passes through the pinhole. lastly forming an inverted image
of the object inside the pinhole camera.
A pinhole camera is a simple camera without a lens and with a single small hole – When light passes through this hole and the image inverters to the opposite side of the box. One example of a similar pinhole that is part of us is the human eye. The human eye does exactly what a pinhole camera does, yes that does mean that the image inverts however our brain flips that image back around.
What are the most unusual objects that have been used to make pinhole cameras over the years?
cameras have been made of sea shells, many have been made of oatmeal boxes, coke cans or cookie containers, at least one has been made of a discarded refrigerator.
How does a pinhole camera work?
Firstly, the suns ray shines on to a object, then the rays reflect off the object.
After the rays passes through the pinhole. lastly forming an inverted image
of the object inside the pinhole camera.
An Illustrated Recipe for Making a Pinhole Camera
|
Ingredients:
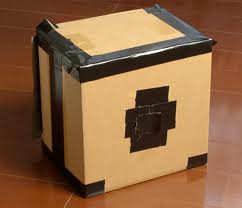
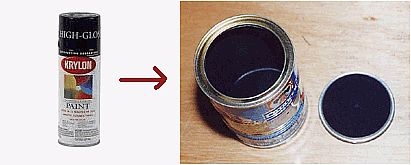
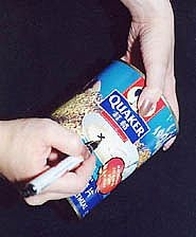
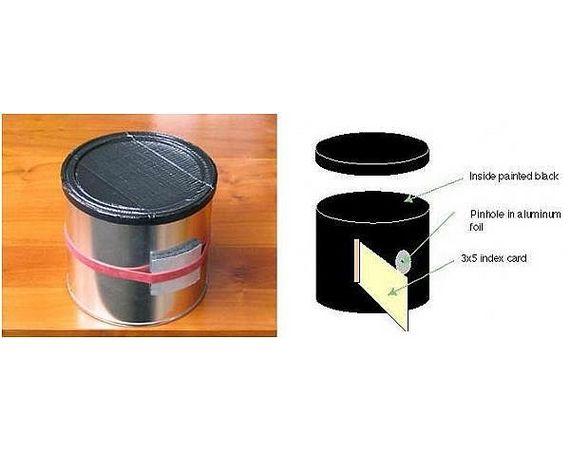
1 x container (e.g. hot chocolate tins, gravy tins etc.) 1 x sharp knife Black Gaffa/Duct tape A thin sharp pin Black matt paint and a brush (or black spray paint) Tinfoil or a soft drink can A pair of scissors (optional) Step 1: Find a suitable container e.g. a hot chocolate tin or box. Try to ensure it has a removable lid and that the material is made light proof. Step 2: Paint or spray the inside of the container black. This will prevent light bouncing around inside, ensuring that you get a clear image. Make sure that the lid of your container is light proof and relatively easy to remove and replace. Step 3: Cut a rectangular hole half way up the container (approx. 2 cm square) take care not to cut yourself! Step 4: Cut a 2.5 cm square piece of tinfoil and smooth it out. Use a pin to create a small hole in the centre of the tinfoil. You can also use a thin sheet of aluminium cut from a drinks can but be careful you don't cut yourself! If you're using aluminium (or even brass) sand around the pinhole making sure there are no rough edges. Step 5: Attach the tinfoil to the container making sure the pinhole is over the rectangular hole you already created. Step 6: Make a shutter flap out of card/tape that can open and close as you need it. Make sure that it completely covers the pinhole. Step 7: In the darkroom (under the red safe light) cut a piece of photographic paper to fit inside your container. Secure it in place with a small piece of tape. It should stay completely still throughout the exposure. Securely attach/replace the lid of your container and close the shutter. Step 8: Take the camera outside and find a suitable subject. Ensure that the camera is stable and can't be moved during the exposure. Open the shutter and expose the paper. Depending on the size of the pinhole and the brightness of the light your exposure can be anything from 30 seconds to 5 minutes. Make an educated guess and use your first image as a guide. Step 9: Close the shutter at the end of the exposure time and take the camera back to the darkroom. Carefully remove the paper and place it in the chemicals:
Step 10: There are two methods for creating a positive from your paper negative: In the darkroom: Make sure that your print is dry. Get a flat sheet of glass bigger than the image and another sheet of paper roughly the same size as your negative. Place the new (unexposed) piece of paper shiny side up underneath the enlarger. Place your paper negative on top of this and the glass on top of both. Select an exposure time of approx. 8 seconds. Expose the image. Remove the bottom piece of paper and develop as before. In Photoshop: Scan your paper negative. Import this scanned image into Photoshop. Select Image-Adjustments-Invert. Adjust the levels if necessary. Rename the image and export as a jpeg. |

|
